Faded leather can make a living room feel tired, especially where sunlight has bleached the sofa arms and cushions. Learning how to restore faded leather living room sets begins with identifying the finish. Aniline, semi-aniline, and coated leather respond differently to cleaners and color products. A wrong match can leave a shiny patch beside a dull cushion. Test any treatment in a hidden spot first.
Leather conservation specialist Cathy Dignard is a relevant expert voice for understanding leather care, but I cannot verify a direct quotation from her on restoring faded living room sets. Rather than invent one, this guide follows a careful principle: “Clean gently, test quietly, and restore only what the leather needs.” It is an editorial guideline, not a quote from Dignard. The steps ahead focus on practical checks: dusting seams, cleaning with a leather-safe product, and assessing whether the color loss is superficial or widespread. Small areas may improve with a compatible conditioner or recoloring product. Deep cracking needs a more cautious plan. Results can vary, and even careful work may leave slight differences in shade. That is worth acknowledging before opening a bottle.
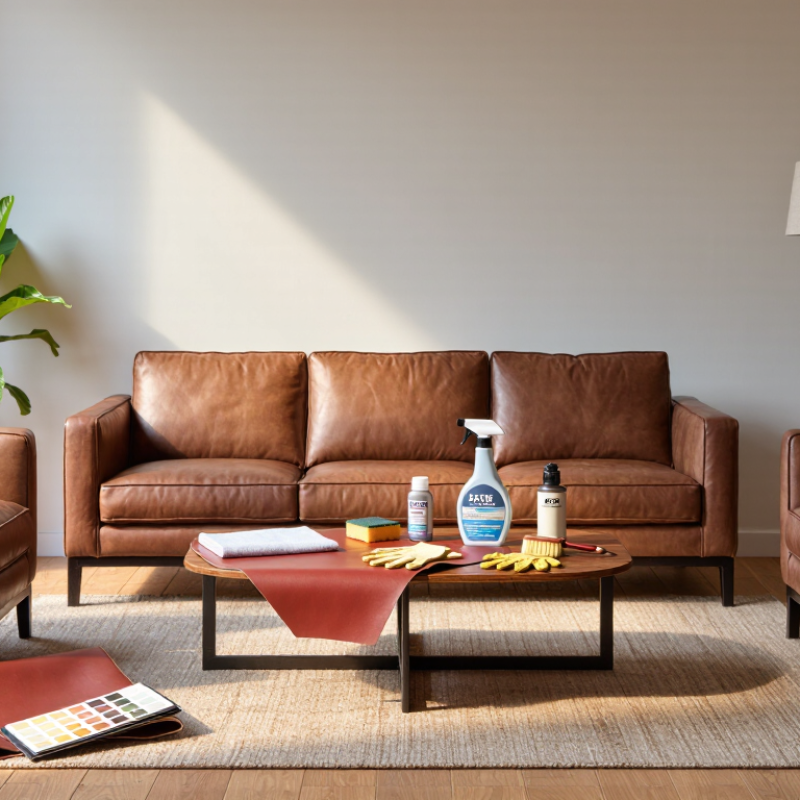
Before treating a faded leather living room set, identify its finish. Check the care label, purchase paperwork, or upholstery details. Aniline leather often shows natural pores and color variation; it may absorb spills and fade more readily. Pigmented leather usually has a more even surface and a protective color coating. Semi-aniline sits between the two. Don’t guess from color alone. Grain and sheen can be misleading.
Look at the seat, back, and sides in steady daylight. Compare a cushion’s exposed center with the area beneath it. A lighter patch near a sunny window may indicate fading, while dark, shiny spots often come from body oils or handling. Cracks, roughness, or color loss along seams may point to wear rather than sunlight. Start gently. Wipe dust with a clean, dry microfiber cloth, then inspect again.
Check whether the color looks uneven or whether the surface itself feels damaged. That matters. If the leather is absorbent, a strong cleaner or conditioner may leave a darker mark; coated leather may respond differently. Test any suitable product on a hidden area, such as the back of a loose cushion, and let it dry fully before judging the result. If the finish flakes, feels sticky, or remains hard to identify, pause and ask a qualified leather-care professional to assess it. I’ve found that rushing this step can make a small color difference harder to diagnose.
How to read this chart: The 1–3 scale is a qualitative guide to typical surface protection, not a laboratory measurement. Aniline leather is generally the least coated, semi-aniline has a light protective finish, and pigmented leather has a more protective surface coating. Actual finishes can vary.
Before restoring a faded set, check its care label or manufacturer guidance and test an inconspicuous area. Compare a faded spot with a less-exposed area, such as beneath a cushion. Avoid applying dyes or conditioners until you have identified the leather and confirmed the product is suitable.
How to Restore Faded Leather Living Room Sets
Dust the sofa and chairs with a soft, dry cloth, including seams where grit can collect. Vacuum creases with a brush attachment on low suction. Dampen a clean cloth slightly; it should not drip. Wipe a small section at a time, then dry it with another cloth. Avoid household sprays, strong detergents, and aggressive scrubbing, which can strip the finish or leave uneven patches. It is tempting to rub harder when a mark remains, but that can make the surface look worse.
Before cleaning the whole set, test the cleaner on a hidden area, such as the back edge beneath a cushion. Follow the product directions and use only a small amount on a soft cloth. Let the spot dry fully, since wet leather can appear darker. Check for color transfer, sticky residue, cracking, or a change in sheen. Stop if the finish shifts or dye comes off. Leather types and coatings vary, so one method may not suit every piece. When the test is unclear, seek advice from a qualified leather-care professional.
Tips: Photograph the test spot before cleaning. Keep the room ventilated, and use separate cloths for cleaning and drying. Patience helps.
Before applying color, identify the leather’s finish. Pigmented leather has a surface coating; aniline leather absorbs liquids more readily. If you are unsure, test a hidden area with a barely damp white cloth. Check for dye transfer, sticky residue, cracking, or color loss. Take your time.
Vacuum seams and creases with a soft brush attachment. Wipe the surface using a clean, lint-free cloth and a leather-safe cleaner, following its directions. Avoid soaking the hide. Water trapped in seams can leave marks, while leftover polish or conditioner may block an even color coat. Let the leather dry naturally, away from heaters and direct sun. No rushing here.
Keep the room stable during preparation. The Canadian Conservation Institute’s leather-care guidance recommends roughly 45–55% relative humidity for leather storage; this is a useful range to avoid excessive dryness or dampness. Before treating the full set, lightly abrade only where the restoration system instructs, then remove every trace of dust. Test the complete process on an inconspicuous patch and let it dry fully. The match may still be imperfect: older cushions often fade unevenly, and one test patch cannot reveal every difference in daylight.
Before applying color, identify the leather finish and choose a dye or restorer made for it. Some finishes absorb color; others have a protective coating that needs a surface product. Test a hidden spot, such as the back edge of a cushion. Let it dry fully, then check the color and feel. A patch test takes time, but skipping it can mean redoing the whole panel.
Clean away dust and body oils with a suitable leather cleaner, then allow the surface to dry. Apply a small amount of color with a soft sponge or lint-free cloth. Use light, overlapping strokes, following the grain and working across one manageable section at a time. Thin layers help reduce streaks and sticky patches. Less is safer. Let each coat dry for the time stated on the product instructions before deciding whether another is needed.
Check the color in natural light, not just under a warm lamp. A faint difference between panels may remain, especially on older leather, and adding too much color can make the surface look flat. I would rather pause than chase a perfect match with another heavy coat. Keep product away from seams and stitching where buildup can collect, and avoid using the furniture until the finish feels dry and no longer tacky.
| Step | What to Do | Practical Guidance | Check Before Moving On |
|---|---|---|---|
| 1. Identify the leather | Check the furniture care label or product information to determine the leather type and finish. | Color restorers and dyes are not interchangeable across all leather finishes. Avoid applying a product intended for aniline leather to protected or coated leather unless its instructions say it is suitable. | Confirm the product is made for the leather type and the intended furniture use. |
| 2. Test in a hidden area | Apply a small amount of the proposed cleaner and color product to an inconspicuous spot. | Let the test area dry fully, following the product label. Check for changes in color, sheen, texture, or surface feel. | Proceed only if the test result is acceptable and the surface shows no unwanted reaction. |
| 3. Clean the surface | Remove dust and body oils with a soft cloth and a leather-safe cleaner. | Use a lightly damp cloth rather than soaking the leather. Do not use household solvents, abrasive pads, or excess water. | Allow the leather to dry completely before applying color. |
| 4. Prepare the work area | Protect nearby flooring and upholstery, and remove or mask hardware where practical. | Work in a well-ventilated space and follow the product label for temperature, ventilation, and protective equipment. | Ensure the surface is clean, dry, and free of lint. |
| 5. Apply a thin first layer | Spread the dye or color restorer evenly with the applicator recommended by its manufacturer. | Use a small amount and work in manageable sections. Thin coats are less likely to look uneven or build up in creases than one heavy coat. | Check for streaks, missed areas, or product pooling in seams and folds. |
| 6. Let the layer dry | Allow the first coat to dry for the time stated on the product label. | Drying time varies with the product, room conditions, and leather surface. Do not assume a fixed drying time or apply another coat while the surface is tacky. | The coat should feel dry as directed by the product instructions before recoating. |
| 7. Build color gradually | Apply additional thin layers only where needed, allowing each layer to dry before the next. | Pause periodically to assess the color in natural light. Stop when the result is even; more product is not always better. | Look for consistent coverage across panels, cushions, edges, and high-wear areas. |
| 8. Finish and cure | Apply a compatible finishing product only if the dye or restorer instructions recommend it. | Follow the label for final drying or curing time. Keep the furniture unused during this period and avoid placing blankets or cushions against damp surfaces. | Resume normal use only when the product has fully dried or cured as directed. |
| 9. Maintain the restored leather | Dust regularly and clean spills promptly with a suitable leather-care product. | Use products compatible with the leather finish. Avoid prolonged direct sunlight and heat, which can contribute to fading or drying. | Reassess the surface periodically and follow the care instructions for the furniture and restoration product. |
After cleaning a restored leather set, let it dry fully before applying conditioner. Damp leather can absorb product unevenly. Check the care guidance for the leather type, since aniline, pigmented, and coated finishes may need different treatment. If you are unsure, test a small amount on a hidden area. Wait until it dries, then check for darkening, stickiness, or color transfer.
Use a soft cloth to apply a thin layer of leather conditioner, working gently across one cushion or panel at a time. Less is usually safer than more. Let it dry. Buff lightly with a clean cloth if the surface feels tacky. Some restored areas may absorb conditioner differently, so a perfectly uniform sheen may not happen. That is normal, but stop if the leather becomes greasy or changes color.
Protect the set from direct sunlight, radiators, and sharp temperature changes; these can dry or fade leather again. Blot spills promptly with a dry, clean cloth instead of rubbing them deeper into the grain. Keep pets’ claws and rough objects away from freshly treated surfaces. I once expected one application to revive every dry patch, but some areas needed assessment and careful repeat care. Be patient, and follow the product’s directions rather than layering on extra conditioner.
Check the care label or upholstery details. Aniline may show visible pores and color variation. Pigmented leather often looks more even. Don’t rely on color alone.
Compare a sun-exposed cushion center with the area underneath it. Lighter patches may suggest fading. Dark, shiny spots can come from handling or body oils. Cracks near seams may indicate wear.
Dust with a dry microfiber cloth. Vacuum creases using a brush attachment on low suction. A quick photo can help you compare changes later.
Use a slightly damp cloth, not a dripping one. Wipe gently, then dry with a separate cloth. Avoid strong detergents and hard scrubbing. Less is safer.
Leather finishes react differently. Test beneath a cushion or along its back edge. Let the area dry fully, then check for color transfer, stickiness, cracking, or sheen changes.
Use a product suited to the leather finish. Apply a small amount with a soft sponge or lint-free cloth. Work in light, overlapping strokes across one section at a time.
Let each thin coat dry as directed before deciding. Check the color in natural light. An exact match may not happen, and extra color can make leather look flat.
Stop if the finish flakes, feels sticky, or loses dye during testing. If the leather type remains unclear, ask a qualified leather-care professional. Guessing can make a small patch harder to fix.
Restoring a faded leather living room set begins with identifying the leather type and examining where the color has worn away. Different finishes may respond differently to cleaning and color products, so test any cleaner or restorer on a small, hidden area first and allow it to dry before proceeding. Gently clean the surfaces to remove dust, body oils, and residue, then let the leather dry fully. Prepare the faded areas by following product directions and avoiding harsh scrubbing that could damage the finish.
To understand how to restore faded leather living room sets, apply a suitable leather dye or color restorer in several thin, even layers rather than one heavy coat. Let each layer dry as directed and check the color in natural light before adding more. Once the color is even and completely dry, apply a leather conditioner to help keep the material supple, followed by an appropriate protective treatment. Regular gentle cleaning and conditioning can help preserve the refreshed appearance.